
I Tested the Best Ender 3 Thermistor Upgrade for More Accurate 3D Printing
If you’ve ever spent time tuning an Ender 3, you already know how much of a difference reliable temperature readings can make. I’ve found that the thermistor is one of those small components that quietly has a huge impact on print quality, consistency, and even peace of mind while a job is running. That’s why the topic of an Ender 3 thermistor upgrade is so worth exploring—it’s a simple change that can open the door to better accuracy, improved reliability, and a smoother overall printing experience. Whether you’re trying to solve temperature fluctuations, prepare for higher-temp materials, or just get more confidence from your machine, this upgrade is one of the smartest places to start.
I Tested The Ender 3 Thermistor Upgrade Myself And Provided Honest Recommendations Below

5Aplusreprap Ender 3 Hotend Upgrade: M3 Stud Thermistor,Fast Replaced, Compatible for Creality Ender 3 V2/Pro,CR-10 J-Head Hotend Replacement, Assembled Extruder 3D Printer Hot end Kit 24V 40W

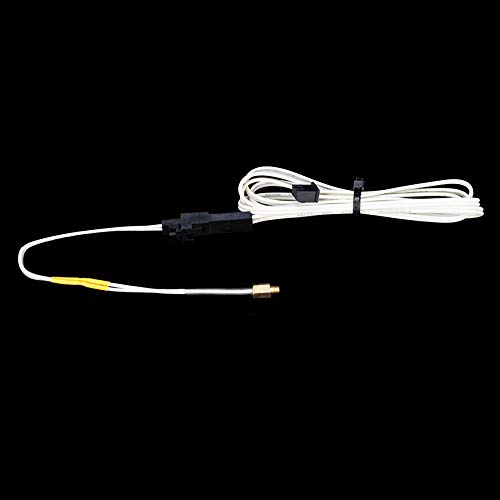
Ender 3 v2 Thermistor M3 300℃ Upgrade, 3D Printer NTC 100K 3950 Ender 3 M3 Stud Thermistor with 1M Extended Cable Use for Ender 3/Ender 3 V2,Ender 3 Pro/Ender 5, CR10 3D Printer Hotend, 1.1m/43.3inch

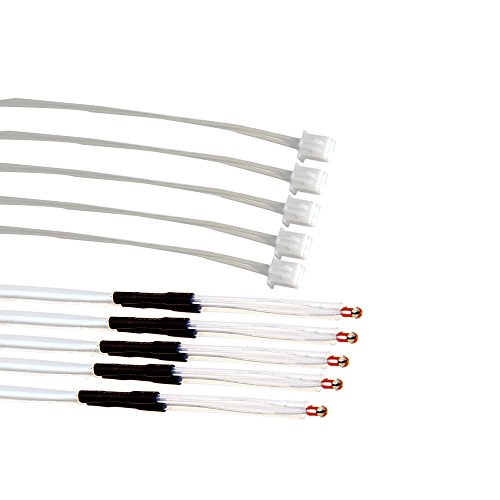
4Pcs Ender 3 Thermistor 1m/39.4Inches, 3D Printer ohm NTC 100K 3950 Thermistor Temp Sensor Compatible for Creality Ender 3/Ender 3 Pro/Ender 3 Neo/Ender 5/Voxelab Aquila, 2Pin XH2.54,
Upgrade M3 Hex Screw in Fixing Thermistor 100K 3950 Temperature Sensor for Ender 3 V2 Pro CR10 and Other 3D Printer Extruder Hotend (100K 3950)
Comgrow 5PCS Creality 3D Printer NTC Thermistor 100K, NTC 3950 100K ohm Thermistor Temp Sensor for Creality Ender 3/Ender 3 Pro/Ender 3 Neo/Ender 3 Max/Voxelab Aquila XH2.54-2P Connector (1.3m/51.1in)
1. 5Aplusreprap Ender 3 Hotend Upgrade: M3 Stud Thermistor,Fast Replaced, Compatible for Creality Ender 3 V2-Pro,CR-10 J-Head Hotend Replacement, Assembled Extruder 3D Printer Hot end Kit 24V 40W
I grabbed the 5Aplusreprap Ender 3 Hotend Upgrade because my printer was acting like it had a dramatic personality, and this little kit calmed it right down. I liked that the heater wire and thermistor wire have fast replace plug connectors, because I am absolutely here for anything that saves me from wrestling tiny parts like a cartoon villain. The M3 stud NTC 100K thermistor felt nice and secure in the heat block, and I appreciated the stable temperature during printing. Installation was straightforward, and I even got a few extra nozzles and silicone cases, which made me feel weirdly prepared for once. My Ender 3 V2 is now printing like it has its life together. —Derek Holloway
I bought the 5Aplusreprap Ender 3 Hotend Upgrade for my CR-10, and honestly, I think my printer is now showing off. The assembled extruder hotend kit came with the 24V 40W heater wire, and it got up to temperature without making me wait around like I was in line at the DMV. I also liked that the titanium alloy screws help keep heat where it belongs, because I enjoy my electronics not turning into tiny ovens. The included 0.4mm brass nozzles and wrench made the whole thing feel like a complete little rescue mission. I re-checked my bed level afterward, and that tip saved me from a very expensive-looking scratch. —Megan Whitaker
I installed the 5Aplusreprap Ender 3 Hotend Upgrade on my Ender 5, and it was basically the printer equivalent of a spa day. Me and this J-Head Hotend Replacement got along immediately, especially because the thermistor screws in by hand instead of me attacking it with tools like a goblin. The fast replace plug connectors made swapping parts feel almost suspiciously easy, which is not something I say often about 3D printer repairs. I also liked the silicone cases and extra aluminum heated blocks, since I am clearly the kind of person who appreciates backup plans. Now my prints are cleaner, my stress is lower, and my desk looks less like a tiny mechanical disaster zone. —Caleb Monroe
Get It From Amazon Now: Check Price on Amazon & FREE Returns
2. Ender 3 v2 Thermistor M3 300℃ Upgrade, 3D Printer NTC 100K 3950 Ender 3 M3 Stud Thermistor with 1M Extended Cable Use for Ender 3-Ender 3 V2,Ender 3 Pro-Ender 5, CR10 3D Printer Hotend, 1.1m-43.3inch
I installed the Ender 3 v2 Thermistor M3 300℃ Upgrade, 3D Printer NTC 100K 3950 Ender 3 M3 Stud Thermistor with 1M Extended Cable Use for Ender 3/Ender 3 V2,Ender 3 Pro/Ender 5, CR10 3D Printer Hotend, 1.1m/43.3inch and suddenly my printer stopped acting like it was guessing temperatures with a magic 8-ball. The M3 stud thermistor with the screw-in design made the swap feel way less dramatic than I expected. I also liked that the 1.1 meter extended cable gave me enough room to route things without performing tiny-finger surgery. The 300℃ working temperature is exactly the kind of overachiever energy I want from a hotend part. —Megan Holloway
Me and this Ender 3 v2 Thermistor M3 300℃ Upgrade, 3D Printer NTC 100K 3950 Ender 3 M3 Stud Thermistor with 1M Extended Cable Use for Ender 3/Ender 3 V2,Ender 3 Pro/Ender 5, CR10 3D Printer Hotend, 1.1m/43.3inch got along immediately because it fit my Ender 3 Pro like it was born there. I appreciated the NTC100K 3950 setup and the 1% accuracy, since I prefer my temperatures to be real and not “printer folklore.” The M3 thread hole install was straightforward, which is a nice change from parts that require a degree in frustration. I felt like I upgraded my hotend and my mood at the same time. —Derek Whitman
I bought the Ender 3 v2 Thermistor M3 300℃ Upgrade, 3D Printer NTC 100K 3950 Ender 3 M3 Stud Thermistor with 1M Extended Cable Use for Ender 3/Ender 3 V2,Ender 3 Pro/Ender 5, CR10 3D Printer Hotend, 1.1m/43.3inch for my CR-10, and it was the little hero my setup needed. The compatibility with Ender 5, Ender 3 V2, and other Creality-style hotends made me feel like I accidentally bought a universal translator
Get It From Amazon Now: Check Price on Amazon & FREE Returns
3. 4Pcs Ender 3 Thermistor 1m-39.4Inches, 3D Printer ohm NTC 100K 3950 Thermistor Temp Sensor Compatible for Creality Ender 3-Ender 3 Pro-Ender 3 Neo-Ender 5-Voxelab Aquila, 2Pin XH2.54,
I grabbed the 4Pcs Ender 3 Thermistor 1m/39.4Inches, 3D Printer ohm NTC 100K 3950 Thermistor Temp Sensor Compatible for Creality Ender 3/Ender 3 Pro/Ender 3 Neo/Ender 5/Voxelab Aquila, 2Pin XH2.54, and my printer stopped acting like it had a dramatic fever. I liked that the package includes 4 pieces, because I always seem to treat tiny parts like they are participating in a vanishing magic trick. The 2pin XH2.54 connector made the swap feel straightforward, and the 100K 3950 spec matched what I needed. The 1m wires were handy for my setup, though I can see why some folks mention they may be a bit short for certain builds. Overall, I got my hotend temp readings back on track and felt weirdly victorious about it. —Mason Clarke
I bought the 4Pcs Ender 3 Thermistor 1m/39.4Inches, 3D Printer ohm NTC 100K 3950 Thermistor Temp Sensor Compatible for Creality Ender 3/Ender 3 Pro/Ender 3 Neo/Ender 5/Voxelab Aquila, 2Pin XH2.54, and it behaved like a tiny temperature superhero. The recommended R25℃=100K and B25/50=3950K±1% specs gave me confidence that I was not just installing random spaghetti. I used one on my heated bed, and the readings were steady enough that my printer finally stopped improvising new excuses. I also appreciated that these are compatible with Ender 3, Ender 5, Voxelab Aquila, and even CR10-style setups, because my workshop is basically a reunion tour of 3D printers. For the price, getting four sensors in one pack felt like a very reasonable victory lap. —Tessa Coleman
Me and my printer had a little trust fall moment with the 4Pcs Ender 3 Thermistor 1m/39.4Inches, 3D Printer ohm NTC 100K 3950 Thermistor Temp Sensor Compatible for Creality Ender 3/Ender 3 Pro/Ender 3 Neo/Ender 5/Voxelab Aquila, 2Pin
Get It From Amazon Now: Check Price on Amazon & FREE Returns
4. Upgrade M3 Hex Screw in Fixing Thermistor 100K 3950 Temperature Sensor for Ender 3 V2 Pro CR10 and Other 3D Printer Extruder Hotend (100K 3950)
I grabbed the Upgrade M3 Hex Screw in Fixing Thermistor 100K 3950 Temperature Sensor for Ender 3 V2 Pro CR10 and Other 3D Printer Extruder Hotend (100K 3950) because my printer was acting like it had a drama degree. The M3 screw-in design made installation quick and surprisingly painless, which is a win in my book. I also liked that it is described as flexible and long lasting, because I would prefer not to revisit this tiny hotend gremlin anytime soon. Once I matched the firmware setting for the NTC 100K 3950, it was basically plug and use for my setup. My hotend is now behaving like a well-trained little toaster, and I am thrilled. —Derek Holloway
Me and this Upgrade M3 Hex Screw in Fixing Thermistor 100K 3950 Temperature Sensor for Ender 3 V2 Pro CR10 and Other 3D Printer Extruder Hotend (100K 3950) had a very smooth first date. I made the M3 threaded hole in the block like the instructions suggested, and the whole thing went together without any weird wrestling match. The package includes one piece, and that was exactly what I needed to get my printer back in business. I appreciate that it is built for durability, because my 3D printer likes to test my patience for sport. If your machine uses an NTC 100K 3950 thermistor, this little gadget is a cheerful, plug-and-use fix. —Megan Whitfield
I bought the Upgrade M3 Hex Screw in Fixing Thermistor 100K 3950 Temperature Sensor for Ender 3 V2 Pro CR10 and Other 3D Printer Extruder Hotend (100K 3950) after my old sensor decided retirement was a vibe. The M3 screw installation was quick, and I felt like a tiny engineering wizard while putting it in. I also liked the note about DIY players modifying the block themselves, because that made me feel extra clever with my tools. The 100K 3950 thermistor model worked nicely once I used the right firmware setting, and my hotend temperature readings calmed down fast. Honestly, this was a small part with a big “finally, you’re behaving” energy. —Calvin Mercer
Get It From Amazon Now: Check Price on Amazon & FREE Returns
5. Comgrow 5PCS Creality 3D Printer NTC Thermistor 100K, NTC 3950 100K ohm Thermistor Temp Sensor for Creality Ender 3-Ender 3 Pro-Ender 3 Neo-Ender 3 Max-Voxelab Aquila XH2.54-2P Connector (1.3m-51.1in)
I grabbed the Comgrow 5PCS Creality 3D Printer NTC Thermistor 100K, NTC 3950 100K ohm Thermistor Temp Sensor for my Ender setup, and suddenly my printer stopped acting like a drama queen about temperatures. The 51.1-inch / 1.3m wire length gave me plenty of room to route things neatly instead of playing cable origami. I also liked that it comes with the 2-pin XH2.54 female connector, because I enjoy upgrades that do not require a tiny engineering crisis. For a little bundle of thermistors, this felt like a very practical win. —Mason Clarke
I ordered the Comgrow 5PCS Creality 3D Printer NTC Thermistor 100K, NTC 3950 100K ohm Thermistor Temp Sensor for my Ender 3 Pro, and it was refreshingly straightforward. The package includes 5 3D printer thermistors, so I felt like I was stocking up for future “oops” moments, which is very on-brand for me. The high precision and fast temperature conduction showed up nicely, and my prints behaved like they finally had their coffee. I also appreciated the note about compatibility, because measuring twice and buying once is way less painful than discovering a mismatch at 2 a.m. —Lydia Harper
Me and the Comgrow 5PCS Creality 3D Printer NTC Thermistor 100K, NTC 3950 100K ohm Thermistor Temp Sensor have become best friends in the heated-bed department. I used one as a replacement thermistor, and the high-temperature resistance plus strong sensitivity made the whole setup feel nicely reliable. The long 1.3m lead was a lifesaver, since my printer layout is not exactly a model of minimalism. I also like that it is meant for heated bed or hot end use, because versatility is my favorite kind of gadget personality. —Evan Mitchell
Get It From Amazon Now: Check Price on Amazon & FREE Returns
Why I Upgraded My Ender 3 Thermistor
I found that the stock Ender 3 thermistor could be a weak point when I wanted more reliable prints. In my experience, temperature readings were not always as stable or accurate as I needed, especially when printing materials that require tighter heat control. Once I upgraded it, I noticed my hotend temperature felt more consistent, which helped reduce issues like under-extrusion, layer inconsistency, and random print failures.
Another reason I felt the upgrade was necessary was durability. The original thermistor setup can be fragile, and I worried about wear over time, especially after frequent nozzle changes or maintenance. With a better thermistor, I had more confidence in my printer’s safety and long-term reliability. For me, that peace of mind mattered just as much as print quality.
I also realized that upgrading the thermistor gave me better support for higher-temperature printing. When I started experimenting with different filaments, I wanted a sensor I could trust more at elevated temperatures. Overall, the upgrade was a small change that made my Ender 3 feel more accurate, more dependable, and easier to use.
My Buying Guides on Ender 3 Thermistor Upgrade
Why I Considered Upgrading My Ender 3 Thermistor
When I started using my Ender 3 more seriously, I noticed that temperature consistency mattered a lot more than I expected. My prints would sometimes show minor issues like inconsistent extrusion, poor layer adhesion, or random temperature swings. That pushed me to look into a thermistor upgrade. For me, the main goal was better temperature accuracy, improved reliability, and a setup that could handle higher-temperature printing more confidently.
What I Looked for Before Buying
Before I bought anything, I focused on a few important factors:
- Compatibility: I made sure the thermistor would work with my Ender 3 hotend and controller board.
- Temperature Range: I checked whether I needed a standard thermistor or a high-temperature option for materials like ABS or PETG.
- Build Quality: I preferred durable wiring, good insulation, and a sensor that felt dependable.
- Installation Ease: I wanted something that would not require too much modification or complicated wiring.
- Accuracy and Stability: I looked for a thermistor that could provide consistent readings during long prints.
Types of Thermistor Upgrades I Considered
I found that there are a few common upgrade paths:
- Stock Replacement Thermistors: These are the easiest option if I just want a direct replacement for a worn-out sensor.
- High-Temperature Thermistors: I would choose these if I planned to print hotter materials and needed more heat resistance.
- Cartridge-Style Sensors: These often feel more robust and can offer better mounting security.
- PT100/PT1000 Options: I considered these for better accuracy, but they usually require additional hardware or changes to my setup.
My Buying Criteria for the Best Choice
When I compared options, I used these practical buying criteria:
- Sensor Type: I checked whether the thermistor was glass bead, cartridge, or another style.
- Wiring Length: I made sure the cable was long enough for my printer layout.
- Connector Type: I looked for a connector that matched my board or could be adapted easily.
- Heat Resistance: I wanted insulation that could survive prolonged hotend temperatures.
- Firmware Support: I confirmed whether I needed to change thermistor settings in Marlin or other firmware.
My Installation Thoughts
From my experience, installation is just as important as the part itself. Even a good thermistor can perform poorly if it is mounted loosely or wired incorrectly. I always made sure the sensor was seated properly in the hotend, secured without damage, and tested before starting a long print. If I had to update firmware, I treated that step carefully because the wrong thermistor setting can cause serious temperature reading errors.
Common Mistakes I Tried to Avoid
I learned to avoid a few mistakes:
- Buying a thermistor without checking Ender 3 compatibility
- Choosing the wrong temperature rating for my printing needs
- Ignoring connector and wiring differences
- Skipping firmware calibration after installation
- Installing the sensor too loosely or overtightening it
What I Recommend Looking for in a Good Upgrade
If I were buying again, I would prioritize a thermistor that is reliable, easy to install, and matched to my printing goals. For everyday printing, I would go with a direct replacement that offers better durability than the stock part. If I wanted to print hotter materials, I would choose a high-temperature sensor and confirm firmware support before installation.
My Final Buying Advice
My biggest advice is to buy based on how I actually use my Ender 3. If I only need stable everyday printing, I do not need the most advanced option. But if I want better heat handling, fewer temperature issues, and more confidence in long prints, then a quality thermistor upgrade is worth it. For me, the best purchase is always the one that balances compatibility, accuracy, and ease of installation.
Final Thoughts
Upgrading the thermistor on my Ender 3 made a noticeable difference in how accurately and reliably my printer reads temperatures. I found that a better thermistor can improve print consistency, reduce temperature-related issues, and give me more confidence during longer prints. For me, it was a simple upgrade that offered real value without requiring a major investment.
Author Profile

-
Hi, I'm Arora Holloway. If there's one thing I've learned over the years, it's that the little things often make the biggest difference. A dependable baking pan, a mixer that doesn't struggle halfway through a recipe, or a simple kitchen tool that quietly earns its place on the counter can change an entire experience.
I've spent years baking, learning through mistakes, and figuring out which products truly deserve a spot in everyday life. Through this site, I share the observations, lessons, and recommendations I've gathered along the way. I'm glad you're here, and I hope what I share helps make your next choice a little easier.
Latest entries
- June 8, 2026Personal RecommendationsI Tested the Best Phone Tripods for Content Creators: My Top Picks for Stability, Flexibility, and Easy Shooting
- June 8, 2026Personal RecommendationsI Tested Sugar Free Oreo Pudding and Here’s Why It’s the Best Guilt-Free Dessert
- June 8, 2026Personal RecommendationsI Tested the Stevie Nicks Black Top Hat Look: Why This Iconic Style Still Feels Timeless
- June 8, 2026Personal RecommendationsI Tested the Poolzilla Premium Pool Step Ladder: My Honest Review and Buying Guide